
This article includes the following sections:
| A walkthrough of how to start setting up a cancellation, and how to pick the affected students. | |
| A guide for how cancellations, partial cancellations, and scheduled sessions look on the calendar. | |
| Instructions on how to make changes to an existing cancellation. |
Set up a new cancellation
There are multiple ways to start setting up a new cancellation in the Calendar in the School Portal. Each way will open the same Set Up Cancellation form, but will start with different selections. Cancellations can be made up to 4 business hours before the scheduled session time.
The “Set Up Cancellation” button will open a blank cancellation form. This is the best way to create a cancellation of any size, class, or date range!

- Click the “Set Up Cancellation” button at the top of the page next to the Filters menu.
- Choose a “Cancellation Name” to describe why sessions will be cancelled. This is the most useful for you and other School Admins to remember why and when events are happening.
- Choose a “Date” for this cancellation, either by choosing a single date, or a date range. The summary will show how many school days are included in the range selected.
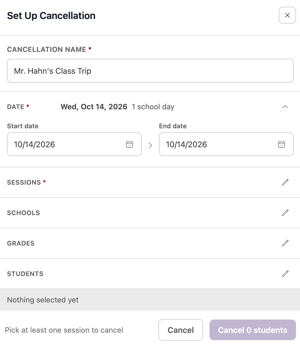
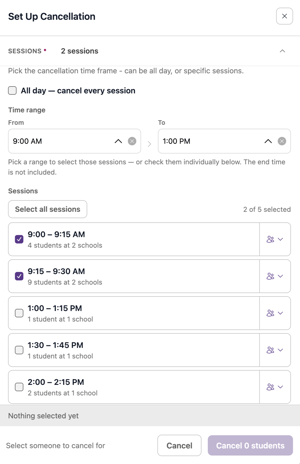
- Choose the “Sessions” that will be cancelled. There are multiple ways to select a time period, including the “All Day” checkbox, which will cancel every session for the day.
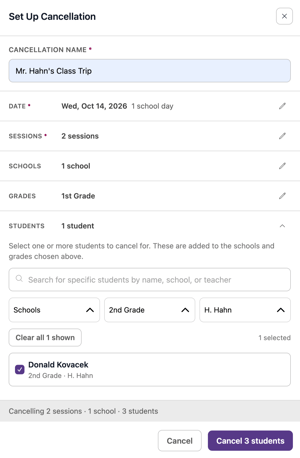
- Now your time is selected, you need to select who. Select some combination of “Schools” (if you have access to more than one), “Grades”, and “Students.” The Students section specifically allows you to add on students not otherwise selected in your combination of Schools and Grades.
- Once your cancellation is shaped, check the summary in gray to confirm that it looks correct, and click the purple “Cancel Students” button.
View remaining sessions
If there is a cancellation on the Calendar, you will be able to see if and how it affects your scheduled sessions.

There are three types of events shown on the calendar, following the color-coded legend at the top of the calendar.
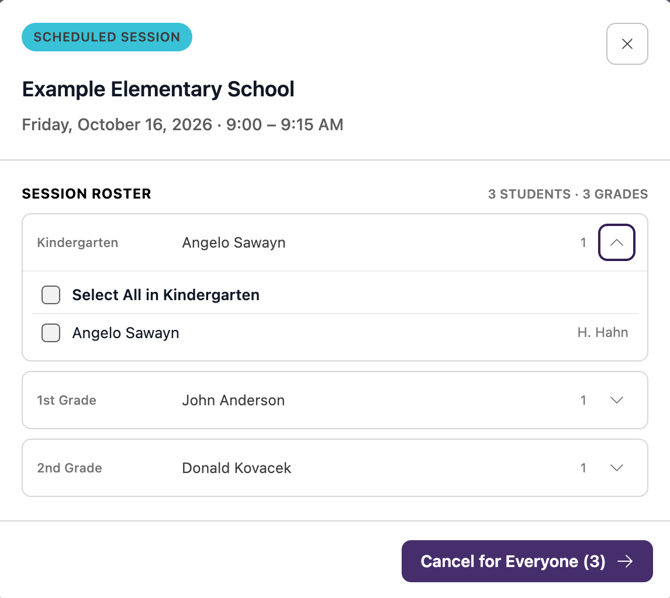
Scheduled sessionsThese sessions are not affected by any cancellation. Scheduled students are organized by grade. All students scheduled are expected to attend. There are multiple ways to create cancellations for these sessions, including selecting students by grade. |
|
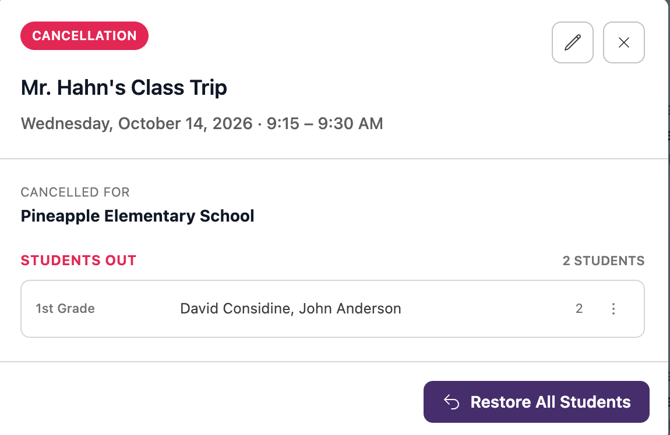
CancellationsThese show which sessions are cancelled and for who. Cancelled students are organized by grade. For any students listed here, Ignite will not be expecting a session and their regular tutor will not be present. Sessions can either be restored per grade, or for all grades affected. |
|
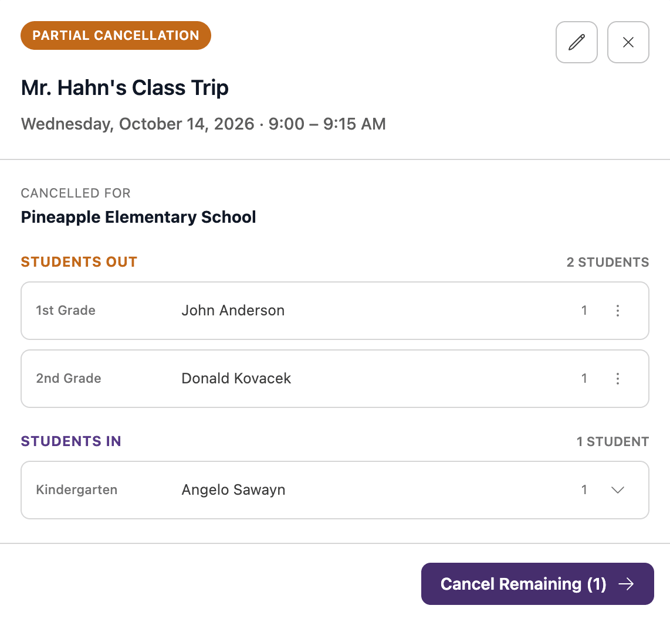
Partial cancellationsThese events show both sessions still scheduled, and any others that are cancelled at the same time. For example, if one student is out at 9am, you will see that student is cancelled, but all other students will still attend. The remaining students can either be cancelled from this view, or the cancelled students can have their sessions restored by grade. |
|
Edit a cancellation
If you click on any cancellation, there will be an Edit button in the top right corner of the window: 
Clicking this button will open the Set Up Cancellation form with the details of the cancellation you were looking at. Change anything on the form and click “Save Changes” at the bottom of the window, to submit updates to your cancellation.
NOTE: the cancellation and restoration time limitations still apply when editing.